Practices for Interactive Birthday Card Designs
Creating interactive birthday card designs, such as animations or sound effects, can make your designs more engaging and memorable. Here are some best practices for creating interactive birthday card designs using birthday card designer software:

-
Plan the Interactivity:
Before you start designing, plan out what kind of interactivity you want to include in your birthday card design. This will help you to determine what kind of assets, such as sound effects or animations, you will need to create.
-
Choose High-Quality Sound Effects:
If you're adding sound effects to your birthday card design, choose high-quality sound effects that will enhance the design. Make sure the sound effects are appropriate for the occasion and that they are not too loud or too quiet.
-
Keep It Simple:
While it may be tempting to include a lot of interactivity in your birthday card design, it's important to keep it simple. Too much interactivity can be overwhelming and distract from the overall message of the card. Focus on one or two interactive elements that will enhance the design and make it more memorable.
-
Optimize for Performance:
When creating interactive birthday card designs, it's important to optimize them for performance. This can include reducing file sizes, using optimized code, and minimizing the number of assets used in the design. This will ensure that the design loads quickly and runs smoothly on all devices.
-
Provide Non-Interactive Versions:
While interactivity can enhance a birthday card design, it's important to provide non-interactive versions of the design for users who may have accessibility or technical issues. This can include providing a printable version of the design or a non-interactive digital version.
-
Consider User Experience:
When creating interactive birthday card designs, consider the user experience. Make sure the interactivity is intuitive and easy to use, and that it enhances the overall message of the birthday card. Avoid making the interactivity too complex or difficult to use.
-
Use Appropriate Animation Techniques:
If you're adding animations to your birthday card design, use appropriate animation techniques that will enhance the design. For example, use easing or motion paths to make the animations more natural and realistic.
-
Test the Design:
Before finalizing the design, test it on different devices and platforms to make sure the interactivity works properly. This will help you to identify and fix any issues before sending the card.
Most Useful Keyboard Shortcuts and Tools in Birthday Card Designer Software
Birthday card designer software provides a variety of tools and features that can help designers create beautiful designs efficiently and quickly. One of the most useful ways to speed up the design process is by using keyboard shortcuts. Keyboard shortcuts are quick combinations of keys that execute a command, eliminating the need to navigate menus or click on icons. Here are some of the most useful keyboard shortcuts and tools in birthday card designer software to improve efficiency and productivity:

Keyboard shortcuts vary depending on the software you are using, but some of the most common shortcuts in birthday card designer software include:
-
Ctrl + N: Create a new document
-
Ctrl + O: Open an existing document
-
Ctrl + S: Save the current document
-
Ctrl + Z: Undo the last action
-
Ctrl + Y: Redo the last action
-
Ctrl + C: Copy selected objects or text
-
Ctrl + V: Paste objects or text
-
Ctrl + X: Cut selected objects or text
-
Ctrl + A: Select all objects or text
-
Ctrl + E: Align objects or text to the center
-
Ctrl + L: Align objects or text to the left
-
Ctrl + R: Align objects or text to the right
-
Selection Tools
Selection tools allow you to select and manipulate objects in your design. The most commonly used selection tools include:
Selection Tool: This tool allows you to select and move objects in your design.
Direct Selection Tool: This tool allows you to select and manipulate individual anchor points on a vector shape.
Magic Wand Tool: This tool allows you to select areas of your design based on color or tone.
-
Drawing Tools:
Drawing tools allow you to create new shapes and lines in your design. The most commonly used drawing tools include:
Pen Tool: This tool allows you to create custom vector shapes by adding and manipulating anchor points.
Brush Tool: This tool allows you to draw freehand lines with different brush styles and sizes.
Pencil Tool: This tool allows you to draw freehand lines with a simple pencil-like tool.
-
Color Tools:
Color tools allow you to change the color of objects in your design. The most commonly used color tools include:
Color Picker Tool: This tool allows you to select a specific color from your design or from a color wheel.
Gradient Tool: This tool allows you to create custom gradients that blend multiple colors together.
-
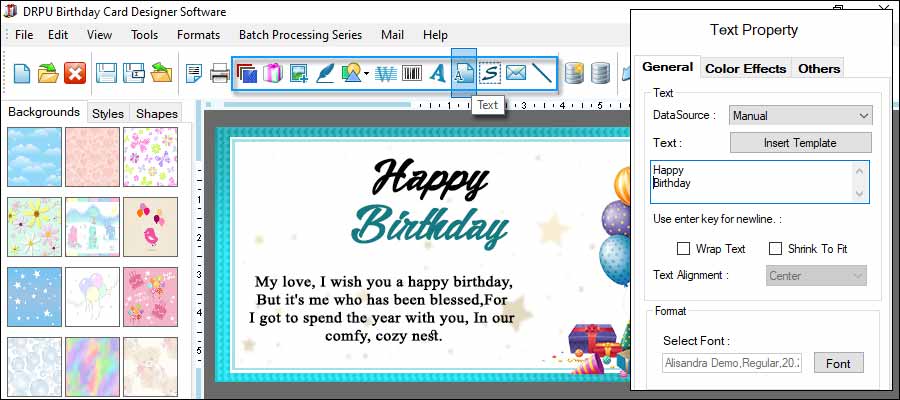
Text Tools:
Text tools allow you to add and edit text in your design. The most commonly used text tools include:
Type Tool: This tool allows you to add new text.
Character Panel: This panel allows you to change the font, size, and other properties of selected text.
Paragraph Panel: This panel allows you to adjust the alignment and spacing of selected text.
-
Layers Panel:
The Layers panel allows you to organize individual layers in your design. You can use this panel to change the order of layers, rename layers, and apply effects to specific layers.
-
Export Tools:
Export tools allow you to save your design in different formats or export it for use in other software. The most commonly used export tools include:
Save As: This command allows you to save your design in a different format or with a different name.
Export As: This command allows you to export your design in a specific file format, such as JPEG or PDF.
In conclusion, birthday card designer software provides a variety of keyboard shortcuts and tools that can help improve efficiency and productivity. Some of the most useful keyboard shortcuts include those for creating new documents, selecting and manipulating objects, drawing new shapes, changing colors, adding and editing text, managing layers, and exporting designs.