-
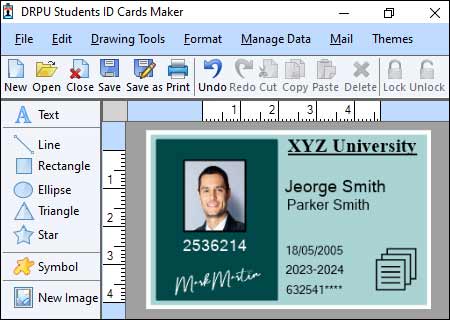
Design: Start by designing the digital student ID card. You can use graphic design software like Adobe Photoshop or Illustrator to create a visually appealing and professional design. Include elements such as the student's name, photograph, ID number, institution logo, and any other relevant information.
-
Dimensions and Resolution: Determine the dimensions of the digital ID card, keeping in mind the typical size of physical ID cards. A common size is 3.375 inches by 2.125 inches (85.6mm x 54mm), which is similar to a standard credit card size. Set the resolution to at least 300 pixels per inch (PPI) to ensure a high-quality output.
-
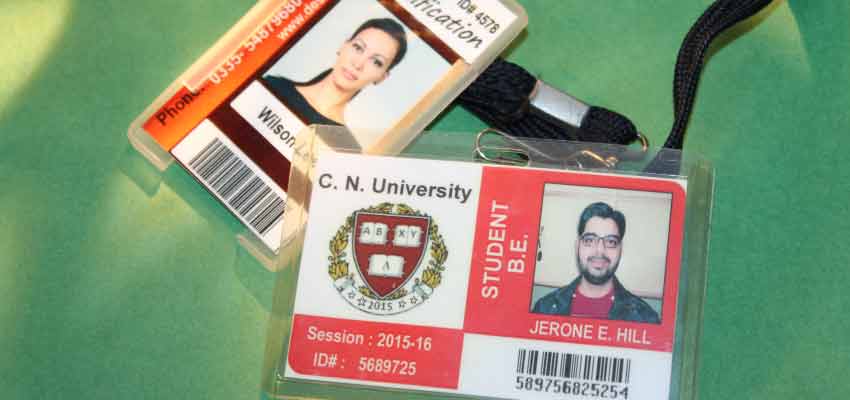
Information Fields: Decide on the information fields you want to include on the digital ID card. These typically include the student's full name, student ID number, institution name, program or major, and a photograph of the student. You may also want to include additional details like the expiration date, barcode, or any other relevant information required by your institution.
-
Data Storage: Determine how you will store the data associated with the digital ID card. One common approach is to store the information in a database or student information system. Each student would have a unique identifier (e.g., student ID number), and the relevant information can be retrieved from the database when generating or verifying the digital ID card.
-
Security Features: Consider incorporating security features into the digital ID card to prevent unauthorized duplication or tampering. This could include holographic overlays, QR codes, watermarks, or other measures that can help validate the authenticity of the ID card.
-
File Format: Save the digital ID card in a suitable file format that supports high-quality images and can be easily shared or printed. Common formats include JPEG, PNG, or PDF. Consider the purpose of the ID card (e.g., online use, printing) when choosing the file format.
-
Accessibility: Ensure that the digital ID card is easily accessible to the students. This could involve creating an online platform where students can download or access their digital ID cards, or integrating it into existing student portals or mobile applications.
-
Verification Process: Establish a reliable method for verifying the authenticity of the digital ID cards. This could involve implementing QR code scanning, barcode readers, or other technologies that can validate the digital ID card against the stored information or database.
-
Security and Privacy: Pay attention to security and privacy concerns when implementing the digital ID card system. Protect student data by implementing appropriate security measures, such as encryption and access controls. Follow relevant data protection regulations, such as the General Data Protection Regulation (GDPR) or other local laws, to safeguard student information.
-
Acceptance and Integration: Work with relevant departments or stakeholders within your institution to ensure acceptance and integration of the digital ID card system. This may involve collaborating with IT departments, administration, or other relevant parties to streamline the process and ensure the digital ID cards are recognized and accepted throughout the institution.
Ensure that Your Student ID Card design is Accessible to All Students
Designing an accessible student ID card is important to ensure that all students, including those with disabilities, can use and benefit from it. Here are some guidelines and considerations to ensure accessibility in your student ID card design:
-
Clear and Legible Text:
Use a sans-serif font with a reasonable size for easy reading.
Ensure a high contrast between text and background colors.
Avoid using decorative fonts that may be difficult to read.
Provide ample spacing between letters and words for improved readability.
-
Color Contrast:
Choose color combinations that have sufficient contrast for individuals with visual impairments.
Avoid using color as the sole means of conveying important information.
Provide alternative text or symbols to indicate different card features or functions.
-
Card Size and Thickness:
Consider the physical needs of all users, including those with limited dexterity or motor skills.
Design the card in a standard size that is easy to hold and fits comfortably in wallets or cardholders.
Avoid excessive thickness, as it can make the card difficult to handle or insert into machines.
-
Information Hierarchy:
Organize the information on the card in a logical and intuitive manner.
Use clear headings, labels, and sections to differentiate between different types of information.
Ensure that essential details, such as the student's name and ID number, are prominently displayed and easily identifiable.
-
Braille Information:
Include Braille text for essential information on the card, such as the student's name or ID number.
Ensure that Braille characters are embossed or raised to facilitate tactile reading.
-
Universal Symbols:
Incorporate universally recognizable symbols to represent various card functions or features.
For example, use a wheelchair symbol to indicate accessibility features or a headphone symbol to represent audio-related services.
-
Compliance with Accessibility Standards:
Familiarize yourself with accessibility standards and guidelines, such as the Web Content Accessibility Guidelines (WCAG) 2.1.
Ensure that your ID card design adheres to these standards, particularly in terms of color contrast, text legibility, and alternative text for non-text elements.
-
Material and Texture:
Consider the tactile experience of the card, particularly for individuals with visual impairments.
Use materials that offer a distinct texture or finish to facilitate differentiation by touch.
Avoid reflective surfaces that may create glare and make it difficult for some individuals to read the card.
-
Consultation and Testing:
Involve individuals with diverse abilities and disabilities during the design process.
Conduct usability testing with a range of users to gather feedback and identify any accessibility barriers.
Iterate and refine the design based on user feedback and recommendations.
Troubleshoot Issues with Student ID Card Design or Printing
Troubleshooting issues with your student ID card design or printing may involve identifying and resolving various problems that can occur. Here are some steps you can take to troubleshoot common issues:

-
Review Design Files:
Double-check your design files to ensure that they are correctly prepared and formatted for printing.
Verify that the file resolution is suitable for printing at the desired size.
Confirm that the color mode is set to CMYK (for print) rather than RGB (for screens).
-
Check Printer Settings:
Ensure that your printer settings match the specifications required for your ID card printing.
Verify that the paper or cardstock being used is compatible with your printer.
Check the print quality settings to ensure they are set appropriately for your desired output.
-
Verify Printer Connectivity:
Confirm that your printer is properly connected to your computer or network.
Check for any error messages or warnings displayed on the printer's control panel or computer screen.
If using a network printer, ensure that it is accessible and properly configured.
-
Test Print on Different Devices:
If possible, try printing your ID card design on a different printer or device to rule out any printer-specific issues.
Print a test page or a small sample of your design to identify any discrepancies or errors.
-
Address Image or Text Quality Issues:
If the printed images or text appear blurry or pixelated, ensure that the design files are of sufficient resolution for printing.
Check if there are any issues with the fonts used in the design, such as missing or corrupted font files.
Adjust the print settings to improve the quality, such as increasing the print resolution or using a higher-quality printing mode.
-
Troubleshoot Color Problems:
If the printed colors do not match your design, ensure that your design is using the correct color profile (CMYK) and color mode.
Calibrate your monitor to ensure accurate color representation during the design process.
Check the printer's color settings and consider performing a printer calibration or color correction if necessary.
-
Verify Card Alignment and Sizing:
Ensure that the ID card is properly aligned and centered on the printing material.
Adjust the print settings or the card layout in the design file to match the card dimensions and positioning.
Check if there are any issues with the printer's paper feed or alignment mechanisms.
-
Consult the Printer Manual or Support:
Refer to the printer's manual or documentation for troubleshooting steps specific to your printer model.
Refer to the printer's manual or documentation for troubleshooting steps specific to your printer model.
-
Seek Expert Assistance:
If you have exhausted all troubleshooting options and the issues persist, consider reaching out to a professional printing service or a specialized ID card printer vendor.
They can provide expertise and assistance in resolving complex printing issues and ensuring the best quality output.
Remember to document any specific error messages, observations, or steps taken during the troubleshooting process. This information will be helpful when seeking assistance or communicating with support personnel.
It's important to note that troubleshooting printing issues may involve a trial-and-error process, and it's advisable to make test prints or prototypes before printing a large batch of ID cards to minimize wastage and ensure quality results.
Date: 08/07/2023