Create Custom Visitor ID Cards with Visitors ID Cards Maker for Mac
With a Visitor ID Card Maker for Mac, you can typically create custom visitor ID cards according to your specific requirements. Here's a detailed explanation of how you can achieve this:
-
Template Selection:
The software usually provides a library of pre-designed templates for ID cards. You can select a template that closely matches your desired design or layout.
-
Customization Options:
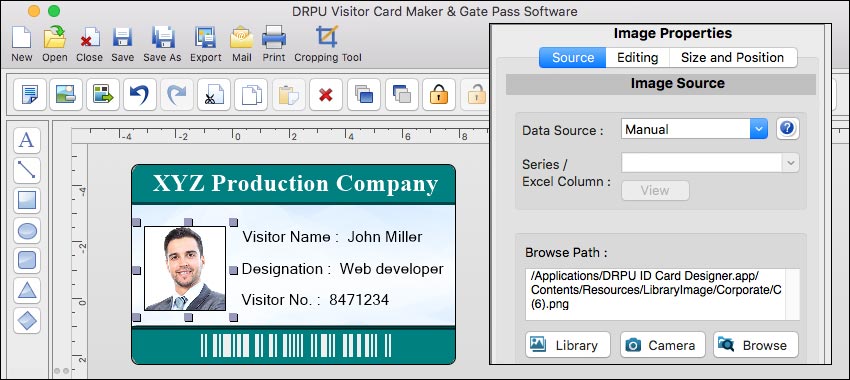
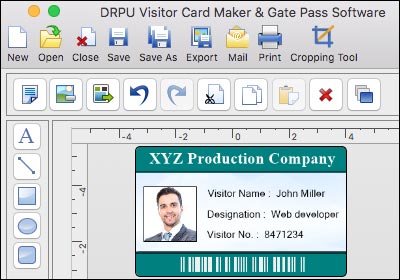
Once you have chosen a template, you can customize it to create a unique design. The software typically offers various customization options such as changing the layout, colors, fonts, and sizes. You can modify the template to reflect your organization's branding or specific design preferences.
-
Data Fields:
The ID card maker software allows you to add data fields to capture visitor information. These fields can be customized and arranged on the ID card template as per your needs. Common data fields include the visitor's name, photo, company name, contact details, visitor type, purpose of visit, and date of visit.
-
Photo Capture or Import:
The software may provide features to capture visitor photos using a connected webcam directly within the software. Alternatively, you can import visitor photos from existing files stored on your Mac. You can resize, crop, or adjust the position of the photo on the ID card template.
-
Barcode/QR Code Integration:
If required, the software may allow you to include barcodes or QR codes on the ID cards. These codes can be generated and customized within the software, and you can link them to visitor information or other relevant data. This feature enables easy scanning and tracking of visitor details.
-
Design Elements:
The ID card maker software typically provides tools to add design elements such as logos, images, icons, or background patterns to the ID card template. You can import your organization's logo or other images and position them on the ID card as desired.
-
Text Formatting:
The software allows you to format the text on the ID card, including font styles, sizes, and colors. You can add captions, headings, or additional information to the ID card design.
-
Preview and Adjustments:
Throughout the customization process, the software usually provides a preview of the ID card design. This allows you to review the changes you've made and make any necessary adjustments before finalizing the design.
-
Printing and Exporting:
Once you are satisfied with the custom ID card design, you can proceed to print it. The software offers options for printing on standard printers or specialized ID card printers. You can adjust print settings such as card size, orientation, and print quality. Additionally, the software may provide options to export the ID cards as digital files in formats like PDF, JPEG, or PNG.
Use own Images and Design Elements with Visitors ID Cards Maker for Mac
ID card makers for Mac are software applications designed to create and customize identification cards. While the specific features and capabilities of different ID card makers can vary, they generally provide a user-friendly interface and a range of design tools to help you create professional-looking ID cards.
To determine if you can use your own images and design elements with the Visitors ID Cards Maker for Mac, you can consider the following points:

-
Importing Images:
Check if the software allows you to import your own images from your local storage, camera, or other sources. Look for options like "Import" or "Add Image" within the application. Typically, you should be able to browse your computer's files and select the image you want to include on the ID card.
-
Supported Image Formats:
Verify the supported image formats in the ID card maker. Common formats like JPEG, PNG, or TIFF are usually compatible with most software applications. Ensure that your images are in a compatible format to avoid any issues during the import process.
-
Image Editing Tools:
Evaluate whether the ID card maker provides basic image editing tools. These tools can help you adjust the size, position, and orientation of your images within the ID card template. Additionally, editing options such as cropping, resizing, or applying filters can be useful for customizing your images to fit the design requirements.
-
Design Elements:
Check if the ID card maker offers a library of pre-designed elements, such as icons, shapes, or backgrounds, that you can use to enhance the visual appeal of your ID cards. Additionally, see if the software allows you to customize or upload your own design elements to create a unique look.
-
Templates and Customization:
Look for a variety of pre-designed templates that suit your needs. These templates can serve as a starting point, and you can modify them by adding your own images and design elements. Assess whether the software allows you to customize the layout, text, and formatting of the ID cards to match your requirements.
-
Exporting and Printing:
Once you have designed your ID cards, verify if the software provides options to export the final designs in various file formats (e.g., PDF, JPEG). This will allow you to save or print the ID cards for distribution or use. Make sure the exported files are in a format compatible with your printing requirements.
Types of Visitor ID Cards Design with Visitors ID Cards Maker for Mac
Visitor ID card maker software usually provides a range of customization options and templates to create various types of ID cards. Some common types of visitor ID cards you can design with such software include:
-
Basic Visitor ID Cards:
These cards typically include essential information such as the visitor's name, photograph, and the name of the organization they are visiting. They may also include the date and time of the visit, and sometimes a unique visitor ID number.
-
Temporary Visitor Badges:
These ID cards are often used for short-term visitors or guests attending events, conferences, or trade shows. They may have a prominently displayed "Visitor" label or badge, along with the visitor's name and a designated validity period.
-
VIP or Special Access Cards:
For individuals with special privileges or access rights within your organization, you can design VIP or special access ID cards. These cards may feature unique designs, security features, or additional information to differentiate them from regular visitor ID cards.
-
Contractor ID Cards:
If your organization employs contractors or external service providers, you can design ID cards specifically for them. These cards may include the contractor's name, photograph, company logo, and relevant information, such as the dates of their contract and any access permissions they have.
-
Staff Visitor ID Cards:
If you want to easily identify visitors interacting with your organization's staff members, you can design visitor ID cards specifically for staff visitors. These cards may include the staff member's name, department, photograph, and possibly a designated area for the visitor's name and purpose of visit.
Import Data from other Sources to use with Visitors ID Cards Maker for Mac
Typically, data import processes depend on the specific software you are using. Here is a general step-by-step approach that may help you import data into different applications:
-
⬗ Identify the Data Source: Determine where your data is located. It could be in a spreadsheet, a database, a CSV file, or any other format.
-
⬗ Prepare Your Data: Ensure that your data is organized and formatted correctly. This may involve cleaning up the data, removing unnecessary columns or rows, and making sure it is in a compatible format for importing.
-
⬗ Open the Software: Launch the Visitors ID Cards Maker application on your Mac.
-
⬗ Locate the Import Option: Look for an "Import" or "Import Data" option within the software. This option is often found in the menu bar or as a button on the user interface. If you are unsure, consult the software's documentation or online resources for specific instructions.
-
⬗ Select the Data Source: Choose the appropriate option to select the source of your data. This might involve browsing your computer's file system to locate the file or connecting to a database using specific connection parameters.
-
⬗ Map the Data Fields: Once you have selected the data source, you will typically need to map the fields in your data to the corresponding fields in the software. This step ensures that the data is imported correctly and aligned with the appropriate categories within the application.
-
⬗ Preview and Validate: Many applications provide a preview of the imported data before the final import. Review the preview to ensure that the data is being imported accurately. Make any necessary adjustments or mappings if required.
-
⬗ Complete the Import: Once you are satisfied with the preview, proceed with the import process. The software will typically import the data and notify you when the process is complete.
Note: Please note that the above steps are general guidelines, and the actual import process may vary depending on the software you are using.
