Generate a MSI Plessey Barcode
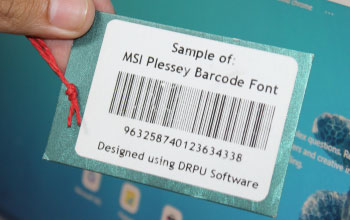
Generating a MSI Plessey barcode involves several steps. In this article, we will discuss the steps involved in generating an MSI Plessey barcode.

-
Step 1: Determine the Data to Encode
The first step in generating an MSI Plessey barcode is to determine the data that needs to be encoded in the barcode. MSI Plessey barcode can only encode numeric characters, so the data should only include numbers. The number of characters that can be encoded in the barcode will depend on the width of the barcode and the size of the label on which the barcode will be printed.
-
Step 2: Choose a Barcode Generator Tool
There are several barcode generator tools available online that can be used to generate MSI Plessey barcodes. These tools are usually web-based and allow users to input the data that needs to be encoded in the barcode, select the symbology (in this case MSI Plessey), and generate the barcode image.
-
Step 3: Input the Data
Once a barcode generator tool has been selected, the next step is to input the data that needs to be encoded in the barcode. The data should only include numeric characters, as MSI Plessey barcode cannot encode letters or special characters.
-
Step 4: Set the Barcode Options
After inputting the data, the user will need to set the barcode options. This will include selecting MSI Plessey as the symbology, setting the width of the barcode, and setting the size of the quiet zone on either side of the barcode. The quiet zone should be at least 10 times the width of the narrowest bar in the barcode.
-
Step 5: Generate the Barcode
Once the data and options have been set, the user can generate the barcode. The barcode generator tool will create an image file of the barcode, which can be saved and printed onto labels or other materials.
-
Step 6: Verify the Barcode
After generating the barcode, it is important to verify that the barcode can be read accurately by a barcode scanner. This can be done using a handheld barcode scanner or by uploading the barcode image to an online barcode scanner tool. If the barcode cannot be read accurately, the user may need to adjust the options and regenerate the barcode until it can be read accurately.
Generating an MSI Plessey barcode involves several steps, including determining the data to encode, choosing a barcode generator tool, inputting the data, setting the barcode options, generating the barcode, and verifying that the barcode can be read accurately. While there are several barcode generator tools available online, it is important to select a reputable tool that can generate accurate barcodes. By following these steps, users can generate MSI Plessey barcodes that can be used for a variety of applications.
Print a MSI Plessey Barcode
Printing a MSI Plessey barcode involves several steps. In this article, we will discuss the steps involved in printing a MSI Plessey barcode.
-
Step 1Select a Printer
The first step in printing an MSI Plessey barcode is to select a high-quality printer that is compatible with the label stock and ribbon that will be used to print the barcode. The barcode or standard printer should have the capability to print high-resolution images, as MSI Plessey barcodes require a high level of detail.
-
Step 2Choose Label Stock and Ribbon
The label stock and ribbon that will be used to print the MSI Plessey barcode should be selected based on the application for which the barcode will be used. The label stock should be compatible with the printer and able to withstand the environmental conditions. The ribbon should be selected based on label stock type.
-
Step 3Create a Label Template
Before printing the MSI Plessey barcode, a label template must be created. The label template will include the layout of the label and the data that will be printed on the label. The label template can be created using label design software or can be downloaded from the manufacturer's website.
-
Step 4Add the Barcode to the Label Template
Once the label template has been successfully created, the MSI Plessey barcode can be added to the label template. The barcode can be generated using a barcode generator tool or the software, as discussed in the previous section, and can be added to the label template as an image.
-
Step 5Set the Print Options
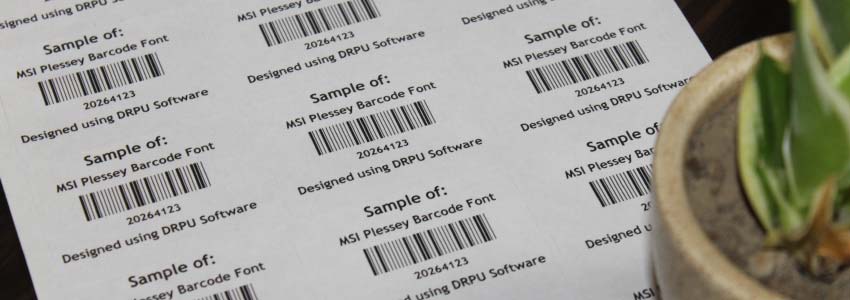
After adding the MSI Plessey barcode to the label template, the print options must be set. This will include selecting the printer, selecting the label stock and ribbon, setting the print resolution, and selecting the number of labels to be printed.
-
Step 6Print the Label
Once the print options have been set in the barcode generator tool, the label can be printed. The printer should be calibrated to ensure that the label is printed with the correct alignment and the barcode is printed with the correct resolution.
-
Step 7Verify the Barcode
After printing the MSI Plessey barcode, it is important to verify that the barcode can be read accurately by a barcode scanner. This can be done using a handheld barcode scanner or by uploading the barcode image to an online barcode scanner tool. If the barcode cannot be read accurately, the printer may need to be recalibrated or the label template may need to be adjusted.

Printing an MSI Plessey barcode involves selecting a compatible printer, choosing the label stock and ribbon, creating a label template, adding the barcode to the template, setting the print options, and printing the label. By following these steps, users can print MSI Plessey barcodes that can be used for a variety of applications. It is important to verify that the barcode can be read accurately after printing to ensure that the label is functional for its intended purpose.
Scan a MSI Plessey Barcode
Scanning a MSI Plessey barcode is a straightforward process that can be completed with a barcode scanner. In this article, we will discuss the steps involved in scanning a MSI Plessey barcode.
-
Step 1: Obtain a Barcode Scanner
The first step in scanning an MSI Plessey barcode is to obtain a barcode scanner that is compatible with the barcode. There are several types of barcode scanners available, including handheld scanners, fixed-mount scanners, and mobile computers with integrated scanners. The scanner should be capable of reading MSI Plessey barcodes and should be compatible with the software that will be used to read the barcode.
-
Step 2: Position the Barcode Scanner
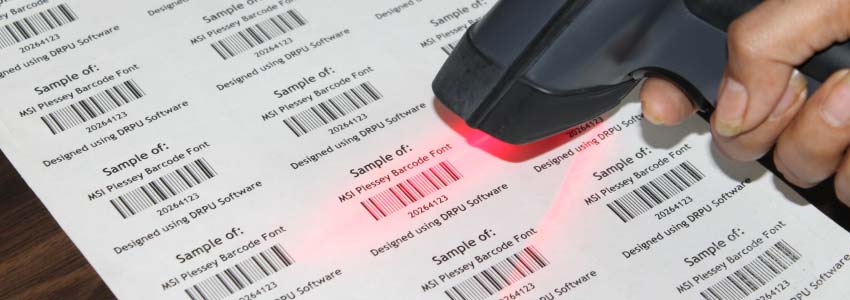
Once a barcode scanner has been obtained, the scanner should be positioned at the appropriate distance and angle to scan the barcode. The barcode scanner should be positioned so that the barcode is centered in the scanner's field of view and is not obstructed by any other objects.
-
Step 3: Scan the Barcode
To scan the MSI Plessey barcode, the scanner should be activated by pressing the trigger or button on the barcode scanner. The scanner will emit a red beam of light that will be reflected off the barcode. The scanner will then capture the reflected light and decode the barcode.
-
Step 4: Verify the Barcode Data
After scanning the barcode, the data that is encoded in the barcode should be verified. This can be done by comparing the data that is displayed on the scanner's screen with the data that is printed on the barcode label. The barcode data can also be uploaded to a computer or other device for further processing.
-
Step 5: Process the Barcode Data
The data that is encoded in the MSI Plessey barcode can be used for a variety of applications, such as inventory management and tracking product information. The data can be uploaded to a computer for processing as well as analysis and integrated with other systems, such as warehouse management systems.
Scanning an MSI Plessey barcode involves obtaining a barcode scanner, positioning the scanner, scanning the barcode, verifying the data, and processing the data. By following these steps, users can quickly and accurately scan MSI Plessey barcodes for a variety of applications. It is important to verify the data that is encoded in the barcode to ensure that the barcode is accurate and can be used for its intended purpose.
Types of Devices that can Read MSI Plessey Barcode
There are several types of devices that can read MSI Plessey barcodes. These include handheld barcode scanners, fixed-mount scanners, mobile computers with integrated scanners, and smartphones with barcode scanning apps. In this article, we will discuss each of these devices and their capabilities for reading MSI Plessey barcodes.

-
Handheld Barcode Scanners
Handheld barcode scanners are the most common devices used for reading MSI Plessey barcodes. These scanners are available in corded and cordless models and are designed to be held in the hand while scanning. Handheld scanners are available in various form factors, including gun-style and wand-style, and can scan barcodes from a variety of distances.
Handheld scanners are ideal for applications where mobility is required, such as inventory management, point-of-sale, and shipping and receiving. They are easy to use and can scan barcodes quickly and accurately. Handheld scanners are also available with features such as Bluetooth connectivity, batch mode, and ruggedized designs for use in harsh environments.
-
Fixed-Mount Scanners
Fixed-mount scanners are designed to be mounted in a fixed position, such as on a conveyor belt or production line. These scanners can read MSI Plessey barcodes as they pass by the scanner's field of view. Fixed-mount scanners are available in various form factors, including linear and omni-directional, and can scan barcodes at high speeds.
Fixed-mount scanners are ideal for applications where barcodes are moving through a fixed location, such as in manufacturing, logistics, and distribution. They are designed to be integrated into existing production lines and can be customized to meet specific application requirements.
-
Mobile Computers with Integrated Scanners
Mobile computers with integrated scanners are handheld devices that combine the capabilities of a handheld computer with a barcode scanner. These devices are designed to be used in applications where both scanning and data collection are required, such as in inventory management and asset tracking.
Mobile computers with integrated scanners are available in various form factors, including ruggedized designs for use in harsh environments. They are designed to be used in applications where mobility is required, and can be customized with software and accessories to meet specific application requirements.
-
Smartphones with Barcode Scanning Apps
Smartphones with barcode scanning apps are becoming increasingly popular for reading MSI Plessey barcodes. Barcode scanning apps are available for both iOS and Android devices and can be downloaded from app stores such as Google Play and the Apple App Store.
Barcode scanning apps use the smartphone's camera to capture the barcode image, which is then decoded by the app's software. Barcode scanning apps are easy to use and can scan barcodes quickly and accurately. They are ideal for applications where mobility is required and the cost of dedicated barcode scanners is prohibitive.
MSI Plessey barcodes can be read by a variety of devices, including handheld scanners, fixed-mount scanners, mobile computers with integrated scanners, and smartphones with barcode scanning apps. The choice of device will depend on the specific application requirements, including mobility, scanning distance, and data collection capabilities. It is important to choose a device that is compatible with MSI Plessey barcodes and that can meet the requirements of the application.